
This is the second of three free photo tutorials I will be posting. Hopefully you’ve already studied the first one on exposure and have begun to understand the basic principles of how the manual settings on your camera are adjusted to alter the exposure when shooting different subjects.
In this post we look at focusing your shots as well as the effects your aperture setting has on the image, in terms of focus.
My photography career started in 2000 and luckily for me by then autofocus was very much standard on all 35mm cameras. We shot mostly 35mm (normal film used in most cameras) back then due to the type of work we were getting however, every now and then a better quality image was required and so we’d turn to Medium format film 645 or 6×7(much larger film, not readily available everywhere). Generally these cameras were manually focused.
Think about this though, not so many years before my career started, all sport photographers were still using manually focused 400mm lenses on their 35mm camera to capture action shots of players running at full sprint towards them! This required immense skill and concentration.
Nowadays though we don’t need to worry about that, although you can still set your DSLR (digital single lens reflex) to manual if you want. This is normally done by sliding a small focus toggle on the side of the lens from “A” to “M”.
Most cameras will have a multi point autofocus system of some sort. This means the camera will use data from various points of your composition, subjects at varying distances from your camera, to calculate what to focus on. The latest cameras are even more sophisticated in that they actually recognise human faces and set the focus to them.
To take better pictures more consistently, you need better control over the focusing and can’t rely on the cameras to choose the best subject to focus on as it can’t possibly know what result you really want. Sometimes manually focusing the image will be the best option.
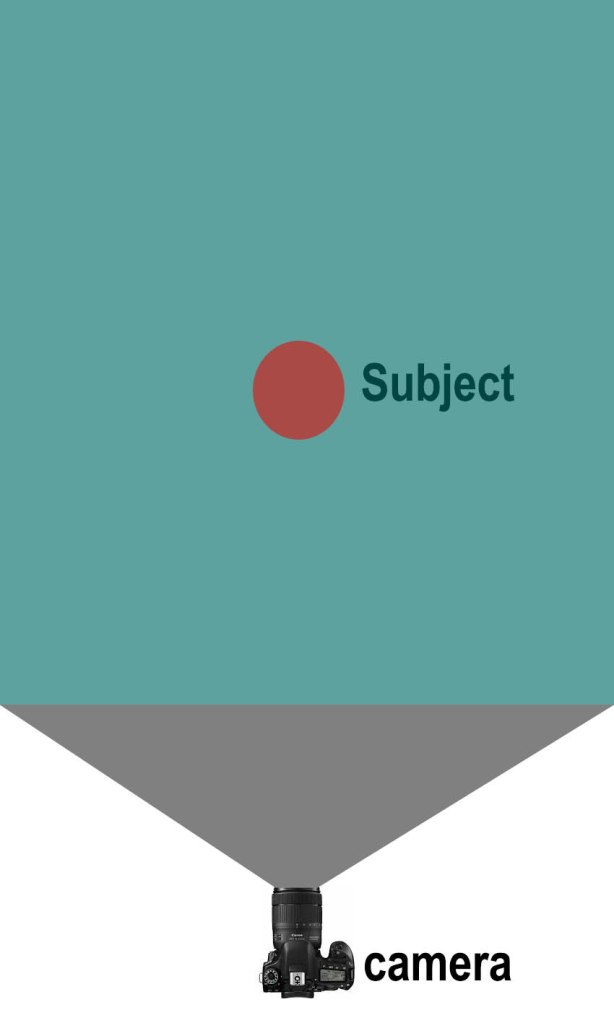
The camera’s focus points will be spread around the viewfinder just like those in the image below, as soon as a subject or part of a subject comes into focus the focus point over it will light up, normally red.
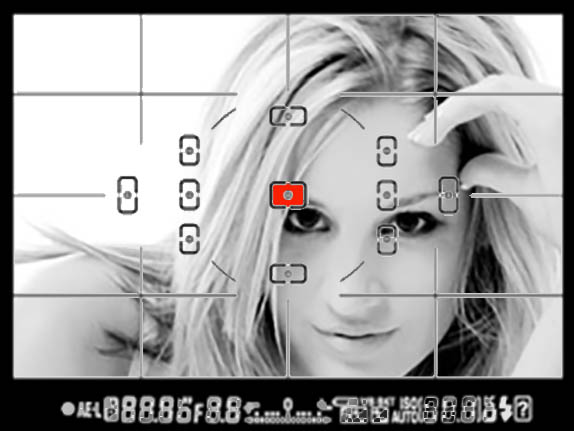
By default your camera will be set to multipoint focus, so the camera will use all focus points. I recommend changing this to a single point and i recommend this to be the center focus point. this is just my preference and isn’t necessarily the best way, but it does give you more control of what you want in focus when setting up tricky compositions.
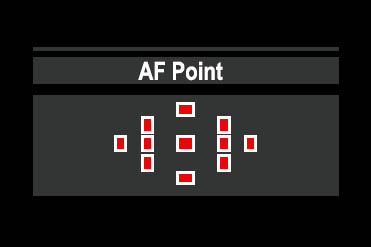
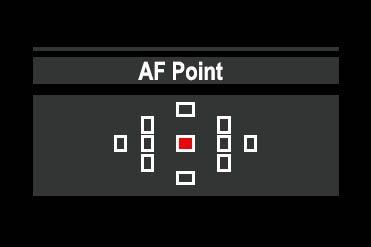
Below is an example of what a focus setting on a camera typically looks like. Obviously, this differs from camera to camera, but the idea is the same. on the left, the image shows all points lit up in red meaning all focus points are active and the camera will use all info to determine what it thinks is the best focus. On the right, the camera autofocus has been set to only use the central point.
You will need to figure out where and how to change these settings on your camera.
When you press the shutter button, the button you use to take the photo, halfway down, your camera will autofocus. You will notice the image in your viewfinder moving from blurred to focused. This sometimes takes a while if the subject is very dark. Once its found focus, the active focus point will light up and the focus will lock in place for as long as you keep the button depressed halfway. So you can now compose your image the way you want it keeping your main subject in focus and framing it as you wish within the image. More on that in the composition post.
Apart from the obvious reason to focus an image correctly, choosing what elements within your image are in focus and which are blurred also helps isolate your main subject from its surroundings and is therefore a strong tool in the overall composition of an image.
A major rule when photographing all living creatures, humans and animals alike is to always always always make sure the eyes are perfectly in focus. This rule generally applies to all types of photography and includes situations where a person’s eyes might be hidden, such as motor sport where the subject is wearing a helmet. Make sure the screen of the helmet or the goggles as it may be are perfectly in focus.
That leads us to the next section and the problems with this theory when your subject is a group of people with many sets of eyes. they all need to be in focus.
This problem is solved by the aperture setting you choose and is why the exposure post was written first. You need to grasp the fundamental points discussed previously about exposure before you can make the right decision on an aperture setting to solve a focus issue.
Aperture controls what is referred to as depth of field. remember the image in the previous post on what aperture is:
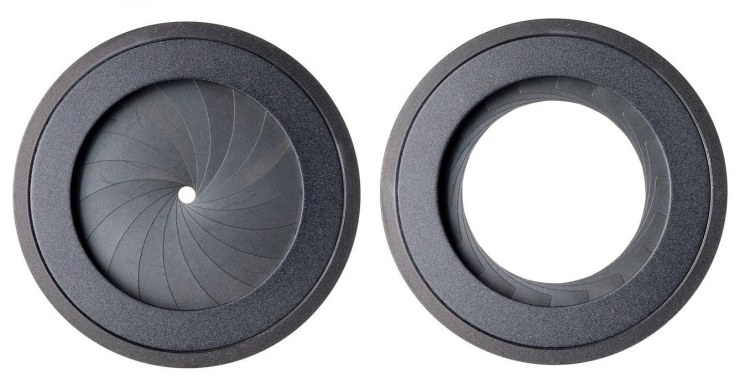
A closed aperture or high F-stop like F22 would look something like the image on the left. Whereas the image on the right would probably be F2.8 or around there abouts.
The effect of concentrating the view through a tiny hole in the diaphragm like that in the image on the left is that more of the scene you are capturing will be in focus. with a wide open aperture like in the image on the right, only a very shallow area of your scene will be in focus. This principal even works for the naked eye and is why as you get older and reading becomes difficult we tend to squint our eyes.
You will often hear the term depth of field when talking photography. This is just the term for the amount of focused area, for example F22 would have a wide depth of field. The area in focus would probably range from less than a metre from the camera to infinity. An aperture of F2.8 would have a very narrow depth of field, so if you focused on a subject one meter away only that point would be in focus and everything almost immediately after that point will start blurring as it gets further from you focus area. This effect is magnified the longer your lens. So for example with a wide angle, 20mm lens you would hardly notice the focus difference unless the subject in focus was very close to the lens, say 30cm away. Whereas with a 400mm lens, even if the subject in focus was five meters way there would be a very big focus difference between subject and background. I recommend you play around with this to get the idea.

The blue area in both images above is the area in focus. The image on the left illustrates a camera set to an F-stop of F22 and in the image on the right the camera is set to F2.8. This should help you understand the difference.

This image is a good example of very shallow depth of field. Only the very front of the image is in focus, the rest is all very burred.
This image was shot with an aperture of F2.8

This image of a building, on the other hand, was shot on F18-F20 (from what I remember) and so the focus extends from the front of the bridge all the way back to infinity.
Taking all this into account, and remembering what we learned about exposure, let’s think about the impact the changes in aperture have on the other two exposure factors in the shots above.
Because the two subjects were “still lifes” we we able to shoot on very slow shutter speeds if necessary and so lets us rule out the ISO setting because the images required the best possible quality and so were both shot on ISO100. We couldn’t allow any gain from a high ISO setting. We used a tripod to ensure there was no camera shake/movement.
In the top image of the plate of food, our F-stop was wide open at F2.8 so lots of light was coming into the sensor/film from the lens so we only needed to slow the shutter speed down to 1/85sec.
In the building image, because we wanted the drama and romance of low evening light with a balance of the lights from the garden and building itself, we were thus, already in need of a longer exposure. Add to that the fact that this was shot with the aperture closed quite small, F18-F20, so there was even less light coming in. This resulted in the need for a very long exposure. The image was shot on medium format film way back in 2003 so I can’t remember the exact setting but it would have been a shutter speed of around 20 to 30 seconds.
In situations where you can’t use a tripod and can’t use a long shutter speed, like when shooting moving objects, you are forced to change one of the other factors, so either up the ISO to 400 or 800 etc or open the aperture. If you are shooting a subject where depth of field is also important, such as a group of people or street scene then you have to keep the aperture closed as much as possible, generally no less than F8 for example, then your only option is to increase the ISO… or get some strong artificial light.
And that’s the FOCUS post, Next we will look at Composition, which is far less scientific and a lot more about personal preference.